Recipe #19 – Honey Sweets

IMG_4573
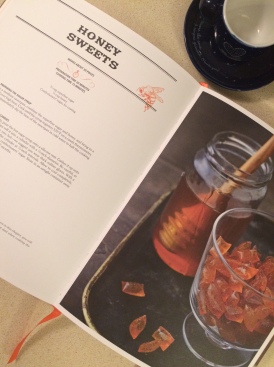
“How hard could it be? There are only 2 ingredients?”

That’s what I said to myself, with a little bit of attitude, I admit. “There’s honey and sugar in the pantry, so I don’t even have to worry about finding some obscure ingredient!”

And the instructions were so simple and straightforward – boil the two ingredients to temperature, turn out onto Silpat, roll into a long tube, and cut it into pieces. Easy peasy!

Ha!


IMG_4576


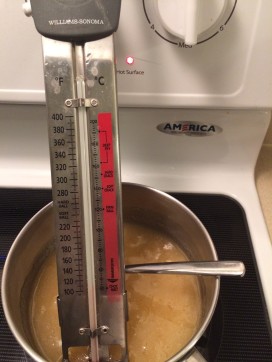
First, I burnt the mixture. Twice.

Sure, I was using my lovely thermometer. But I neglected to put the bottom of the pot into cold water, to stop the cooking process. Fail. Twice.

Can I take a minute to say how much I detest electric ranges? I’ve adjusted to a lot since this move to Florida, but I will never get used to cooking on an electric stove top. It’s. The. Worst.


IMG_4577
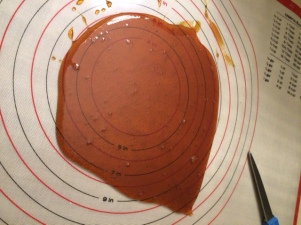
Next, pour it onto the Silpat. Beautiful! Though I was a little worried about how liquidy it was. I expected this to start forming into a chewy ball on it’s own.

Oh well. It will work out. The next step says to roll it into a ball. The mixture is “quite warm,” so they recommend wearing rubber gloves. I only had regular kitchen gloves available, so that’s what I used.


IMG_4578
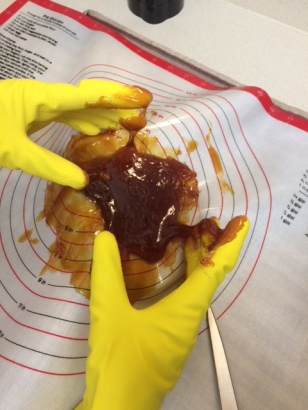
Disaster! This mixture did not want to roll itself into a ball or a log or any other shape. It stuck to the gloves mercilessly. (It’s honey and sugar, what was I expecting?!) It pulled at the Silpat – and nothing ever sticks to that stuff!

What to do? I ditched the gloves, and had a glass of wine while I contemplated how this little two-ingredient recipe had gone wrong. There’s not much to mess up.

Turns out, all it needed was a little time to cool off. Once it had cooled a bit, it pulled together into a ball with ease. And no gloves required!


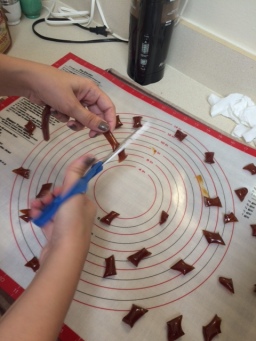
Roll it into a log. Cut into little pieces. Work fast here, because as it cools, it gets much harder to work with.

IMG_4582 IMG_4583

Once they’re fully cooled, coat them in confectioner’s sugar, and keep in an air-tight container.

So, these were good. But I would only recommend eating them if you need to remove a tooth or a filling or something. They’re unbelievably sticky. We couldn’t even eat them all. But they’re really pretty, and probably would make for a lovely gift.

IMG_4628

Also, I need to work on my food photography. ‘Cause it’s terrible.

Onwards!


Continue reading

Recipe #17 – Candied Kumquats

Yep. This is apparently a thing. After the pineapple disaster, I’m boldly going back into the fire.

The kumquats needed to be blanched. Then boiled in sugar syrup for 3 minutes a day, once a day, for four days. Now they’re sitting in the syrup for a week. In the basement. Where it’s nice and cool.

We’ll see what happens. Keep your fingers crossed for me!

Also, I want to take this moment to say, Sweet Baby Jesus, there’s a ton of sugar in these recipes!  It’s one thing to read “6 cups of sugar” when you’re looking at a recipe. It’s an entirely different thing to actually measure out and pour 6 actual cups of sugar into a bowl.

On an unrelated note, I’ve started running more often and have been attending barre classes 3 times a week.

Recipe #14 – Candied Pineapple

This may be shaping up to be the biggest disappointment in the book so far.

When I first thumbed through these beautiful pages, there was one recipe above all others that caught my attention. I’ve been itching to try it. And this weekend was it.

Ladies and gentlemen, candied pineapple.

download (6)

Do you see the picture? It’s a whole pineapple. Candied. With the leaves, which become edible after the candying process. It’s beautiful. Colourful. Jewel-toned.

But then I read the recipe.

It calls for a Victoria pineapple, which is apparently a tiny pineapple. About 5 inches tall. I’ve never even heard of this before. Where does one buy a Victoria pineapple? I can’t find much. What I have learned is that it is grown in Reunion, an island off the coast of Madagascar, and mostly shipped to France. So, I’m not sure of my chances of finding one.

The recipe has an alternative for those of us who can’t find a Victoria pineapple. It’s pretty boring. Simply slicing the pineapple, removing the skin and leaves, and soaking in sugar syrup.

So that’s what I’m doing. I’m disappointed -I was looking forward to candying the whole fruit, and to having a beautiful presentation. Don’t ask what I was planning on doing with it. And I’m sure the candied slices will be fine. It’s just not what I wanted.

The fruit is soaking, it’s been boiled in sugar syrup and is now resting. A few more days and we’ll have our finished product. Stay tuned!

Recipe #13 – Orange Marmalade

I adore orange marmalade. It’s my topping of choice for scones, toast and muffins. So I was pretty happy to see this recipe in the book. And, as with many recipes in this book, it’s a prerequisite for a few others.

download (5)

I’ve made marmalade before. It’s been an arduous, time-consuming process that leaves me unable to use my hands much afterwards. The peeling and fine dicing of the orange and lemon (my favorite combination), and preparing the peel, cramps my hands and wrists like nothing else. But, I suffer because I love it. And it makes a lovely holiday gift. There’s probably some tool or method of doing this that would make life easier.

This recipe, though, is different. You blanch the oranges whole, then cut them into large chunks. That’s what the recipe says. No fine dicing. No peeling. I’m feeling like I’ve scored big time with this.

This recipe is oranges, sugar, and cardamom. That’s it. No pectin or other thickening agent. Simple. You put the blanched oranges, cut into large chunks, sugar and cardamom in a bowl and let it macerate overnight.

download (3)

The next day, the mixture is boiled for a while, then canned. That’s it! Really easy, guys!

download

And yet, I am skeptical.

First, I expected the oranges to fall apart a bit more after macerating overnight. But they were still in pretty big chunks, with no apparent intention of breaking apart. Which, really, would make it pretty hard to spread onto toast! So I spent a while actually cutting the orange pieces with kitchen scissors, into more manageable sizes.

download (1)

After canning and processing, the marmalade is apparently ready after just a day. But it was still pretty liquidy. I expected the sugar to gel the marmalade a bit more, but without pectin, I don’t know how much it will happen. So I let it sit a few days more, and it looks like it’s gelling, but not much.

Also, can we talk about how much sugar goes into this?! I’ve known that marmalade is high in sugar, but I tend to ignore it because … well, because I like to eat it. But making this recipe, I was struck by just how much sugar it is.

So, I’m going to test it tomorrow and we’ll see what happens. But I think I may go back to my traditional marmalade-making ways.

download (2)

Candied Orange Peel, Continued

It’s been fun to see the orange peel candy over the course of this week. I started it on Sunday night, and it’s taken 15 minutes of my time each evening since then.

Sugar is added to the syrup, the syrup is brought to a boil. The orange peel sits in the syrup overnight. Repeat.

Tomorrow morning I remove the peel from the syrup and let it dry. I’m really curious to see what that process looks like. Have to admit that I’m more than a bit skeptical that this will work.

The peel has become more malleable and translucent as it absorbs the sugar syrup. This is a lot of sugar, you guys. But, it’s very pretty. I imagine that this would be a very good addition to the panettone I make during the holidays, or hot cross buns.

Will check in once the process is complete! Stay tuned…

download (2)download (7)download (8)